Appointment Scheduler
Creating an appointment
-
To create an Appointment, select appointment from the top navigation bar. From the calendar
select a time slot for the specific appointment under the specified doctor’s name.
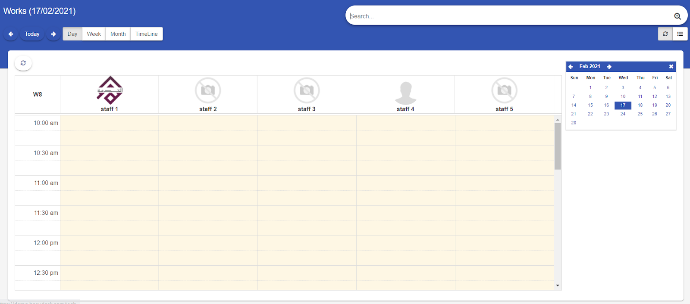
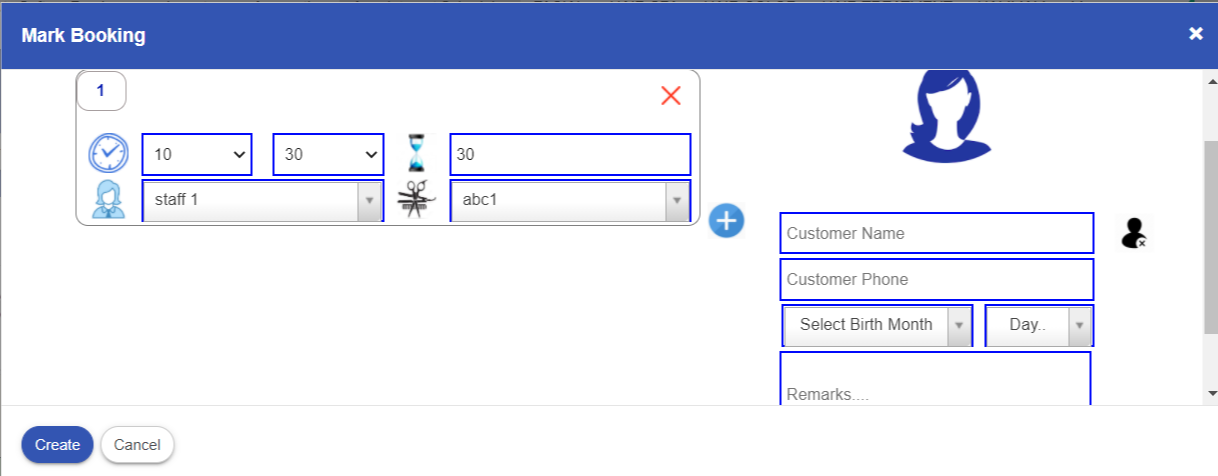
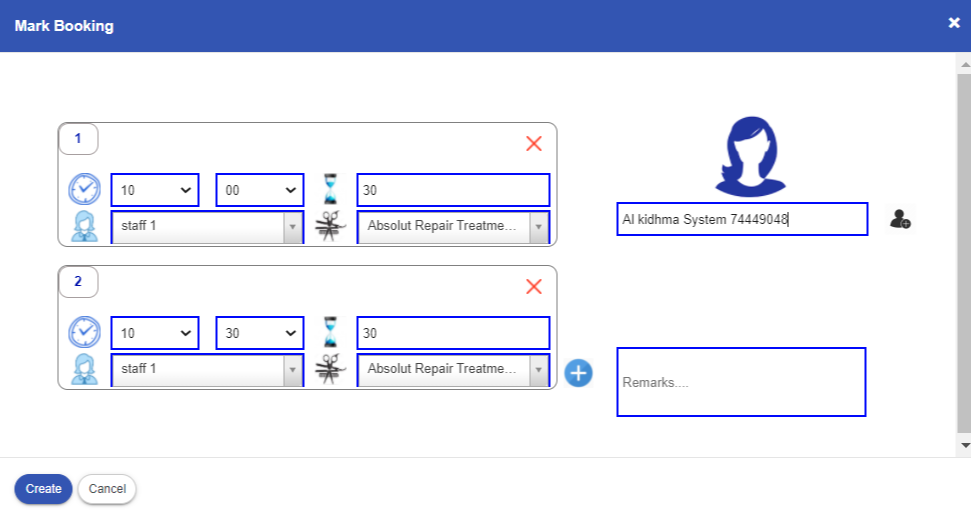
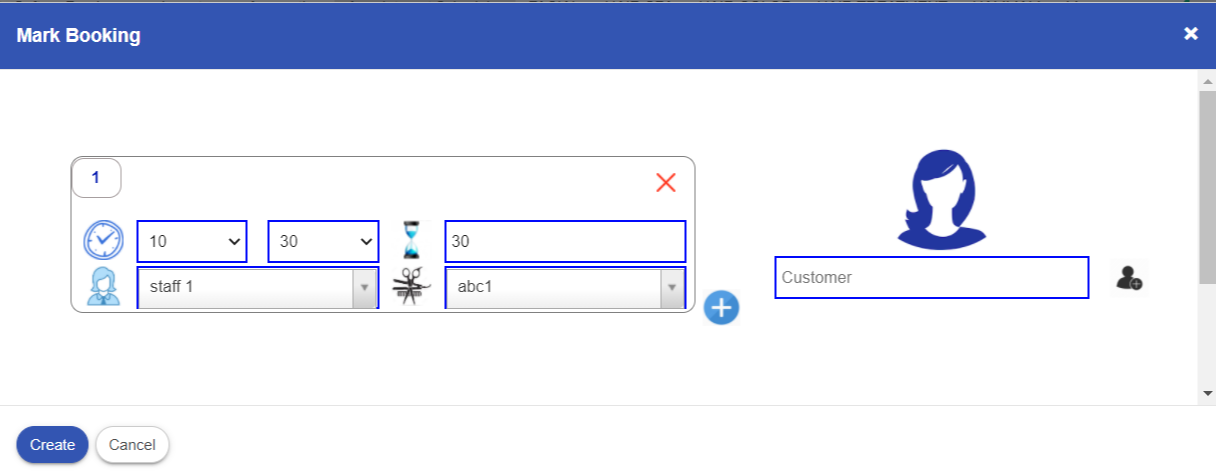
- Select a designated slot under the designated staff name. A form will appear as shown in the figure.
-
To create a new customer click on
icon, this will give you new fields to provide customer details
-
Fill up the form by providing all the necessary details. Click on icon to add additional services.
-
Once you done with the fill up click on “create”. An appointment will be scheduled for the
customer for the given details.


Appointment status and modification
Steps
-
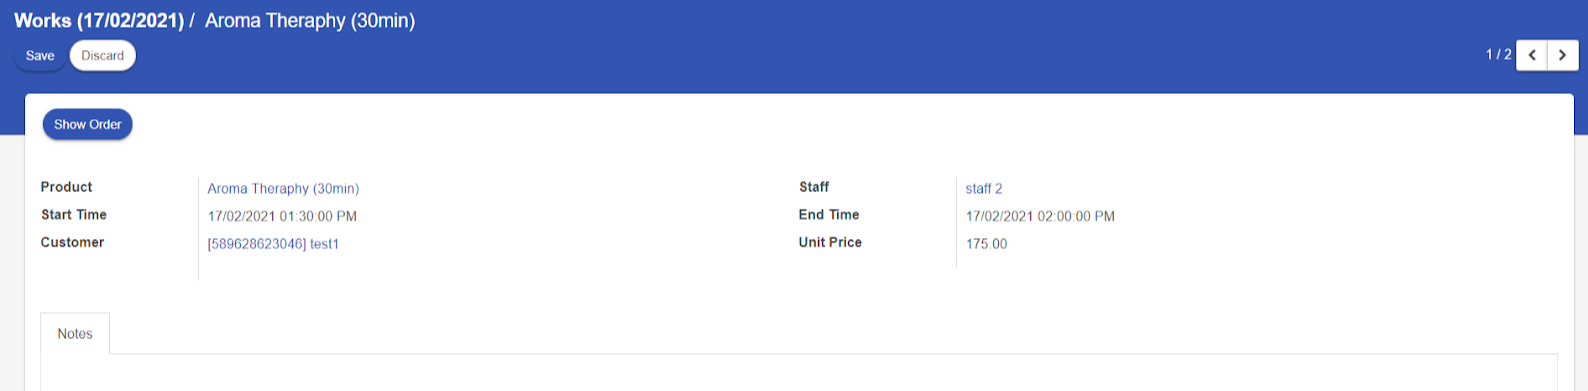
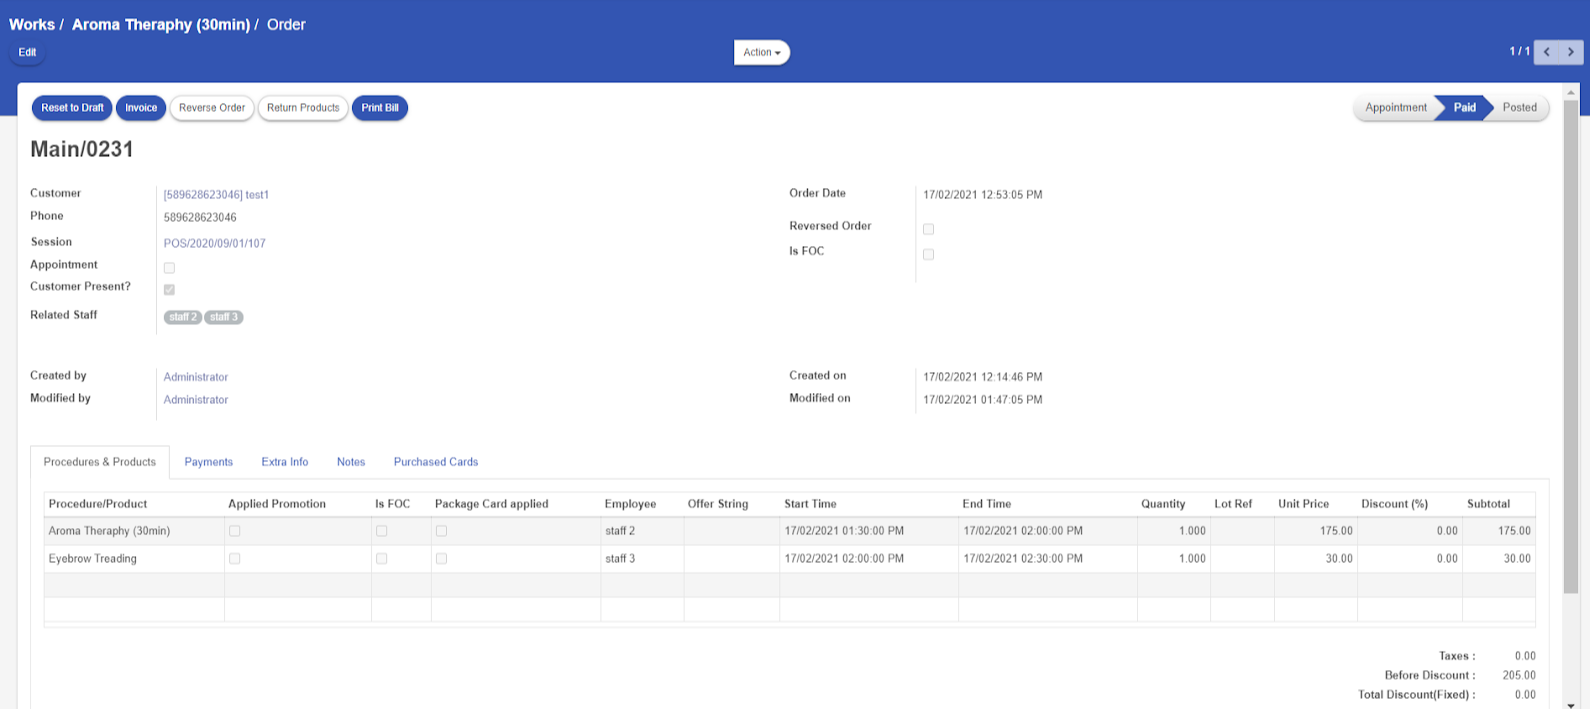
Once the appointment is created, the users can view or modify by clicking created
appointments. To view the appointment details click on “show order”. You can see the details in
below figure
-
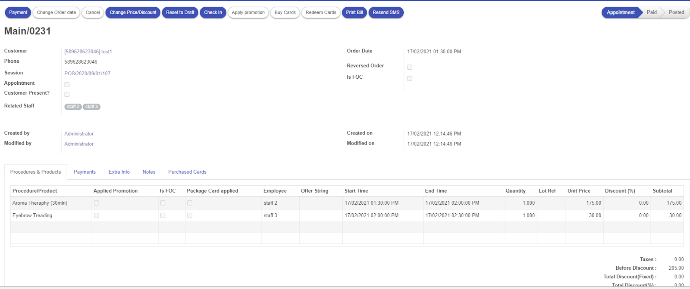
As per the necessity ,the appointment can be the modified by date or can able to add
additional services in the current page after clicking “show order”
-
In case of any promotion or card redemption, the reception can also do the necessary by
clicking on the designated buttons provided on the top

-
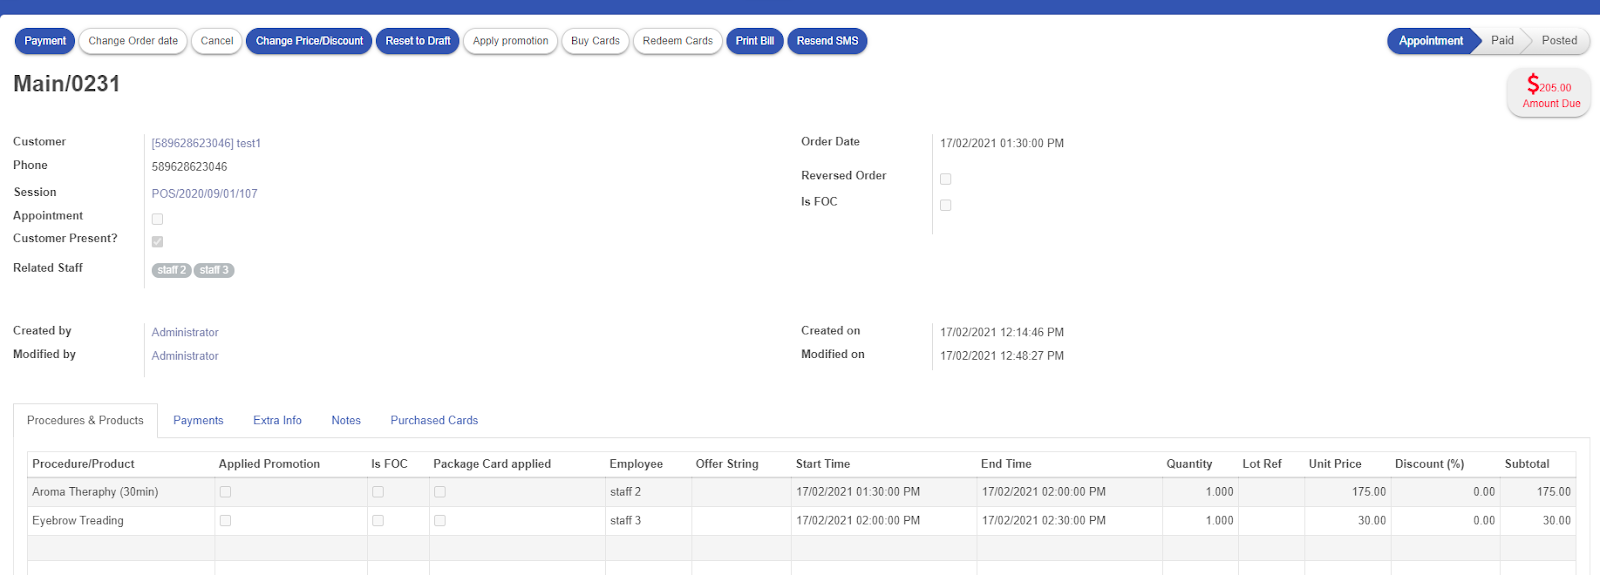
Once the customer arrives in the salon and want to go through the booked procedures you
can select the” Check in” status. An invoice will be generated for the payment and can be
registered.
-
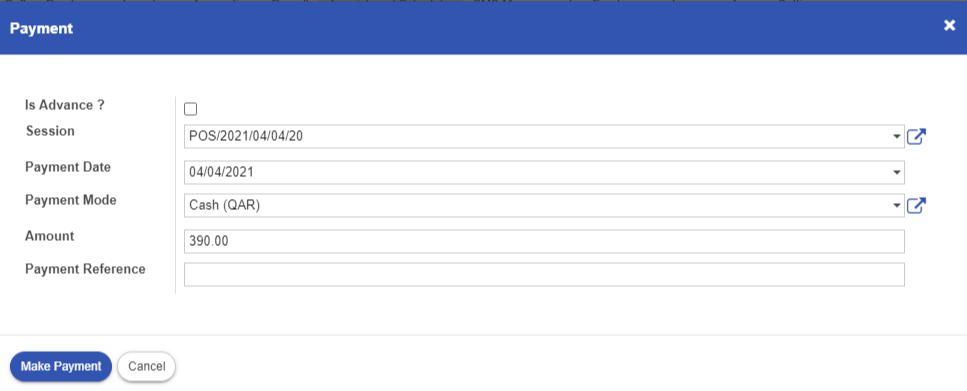
If the customer wants to see the payment details you can click on “print bill” and confirm the
payment. Then to complete the payment click on “payment” from the top.
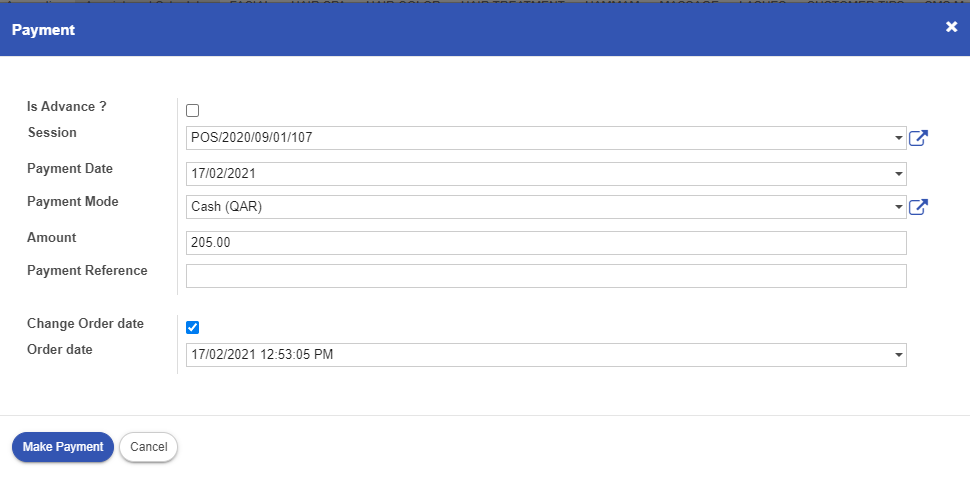
‘A new wizard with all the payment details will appear on the screen. Customer can also select
the mode of payment here ,then click make payment to complete.
-
Once the necessary information is filled, click print pill to give printed bill to the customer.
Invoice status will change to paid status.
VIP Treatment Percentage
steps:
-
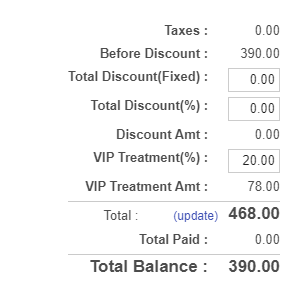
Choose the appointment from appointment scheduler and click on show order and to edit click on edit button. Then in the payment line you can see the option for VIP treatment. Enter the percentage for VIP treatment.
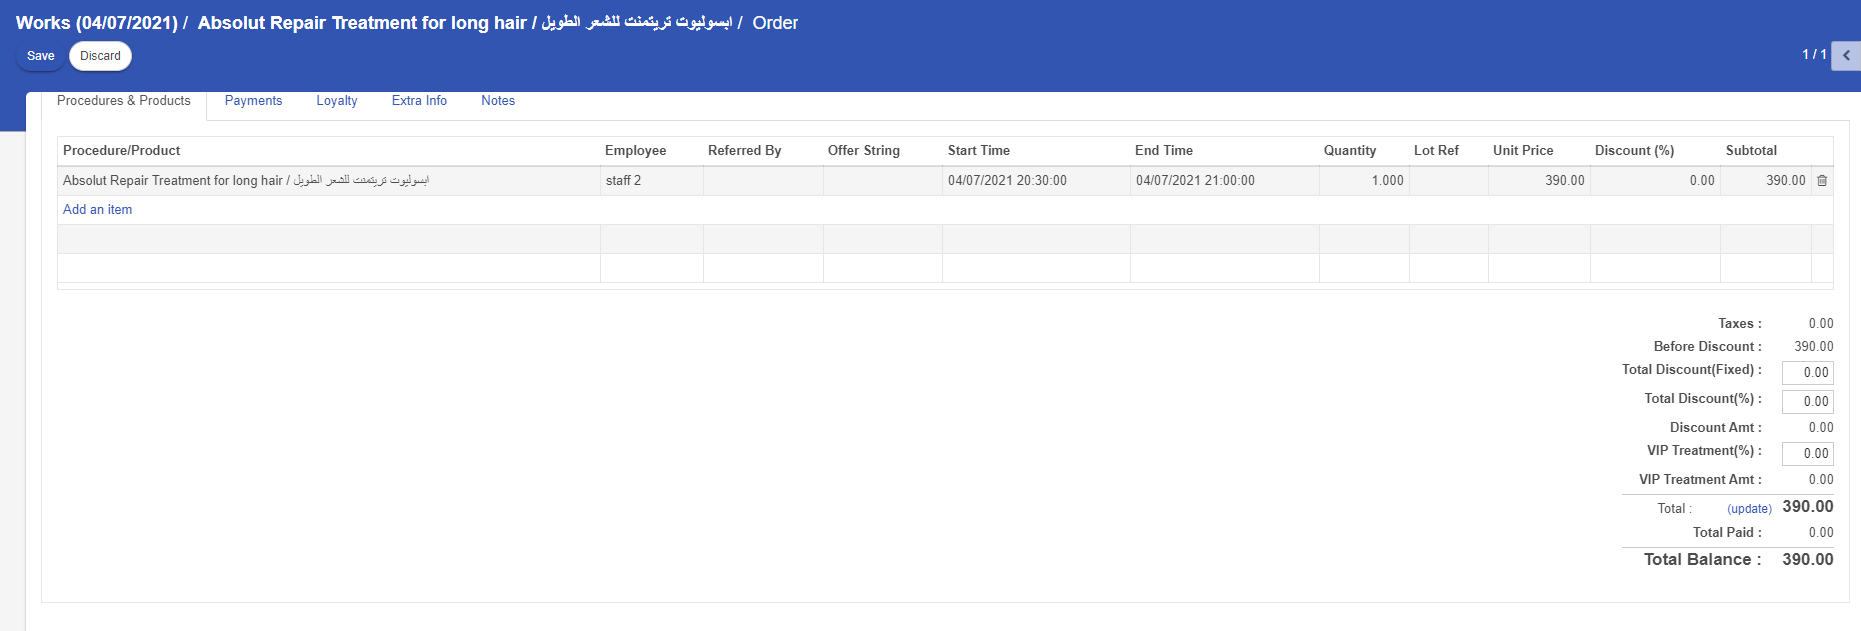
-
System will automatically calculate the total
Advance Payment
There is also an “Is Advance” option, which can be used by customers to pay in advance
for future appointments.
steps:
-
To do that, simply check the “Is Advance” box and like before you
can register the payment by clicking on the “Make Payment” button.